Connecting and deduplicating your data in real-time to create the single source of truth
Managing data in Snowflake can be a challenging task, especially when it comes to identifying and resolving duplicate or related entities within a dataset. This is critical for ensuring data accuracy and completeness, but it can be a complex and time-consuming process without the right software.
That’s where Tilores enters the game. Tilores is a built for purpose platform that enables data matching in real time and at scale without any manual effort, seamlessly integrating with Snowflake and performing entity resolution on top of Snowflake data.
In this blog post, we'll take a closer look at how Tilores connects to Snowflake to help users overcome the challenges of entity resolution, and how it can improve data quality and streamline data management processes.
Create a database in Snowflake
Let's start by creating a new database in Snowflake.
Open a worksheet to create a new Orders table and to add some example data into it.
Notice that John is spelled in two different ways and has two different emails.
We're also creating a newsletter subscription table and adding a few rows there.
Create schema and rules in Tilores
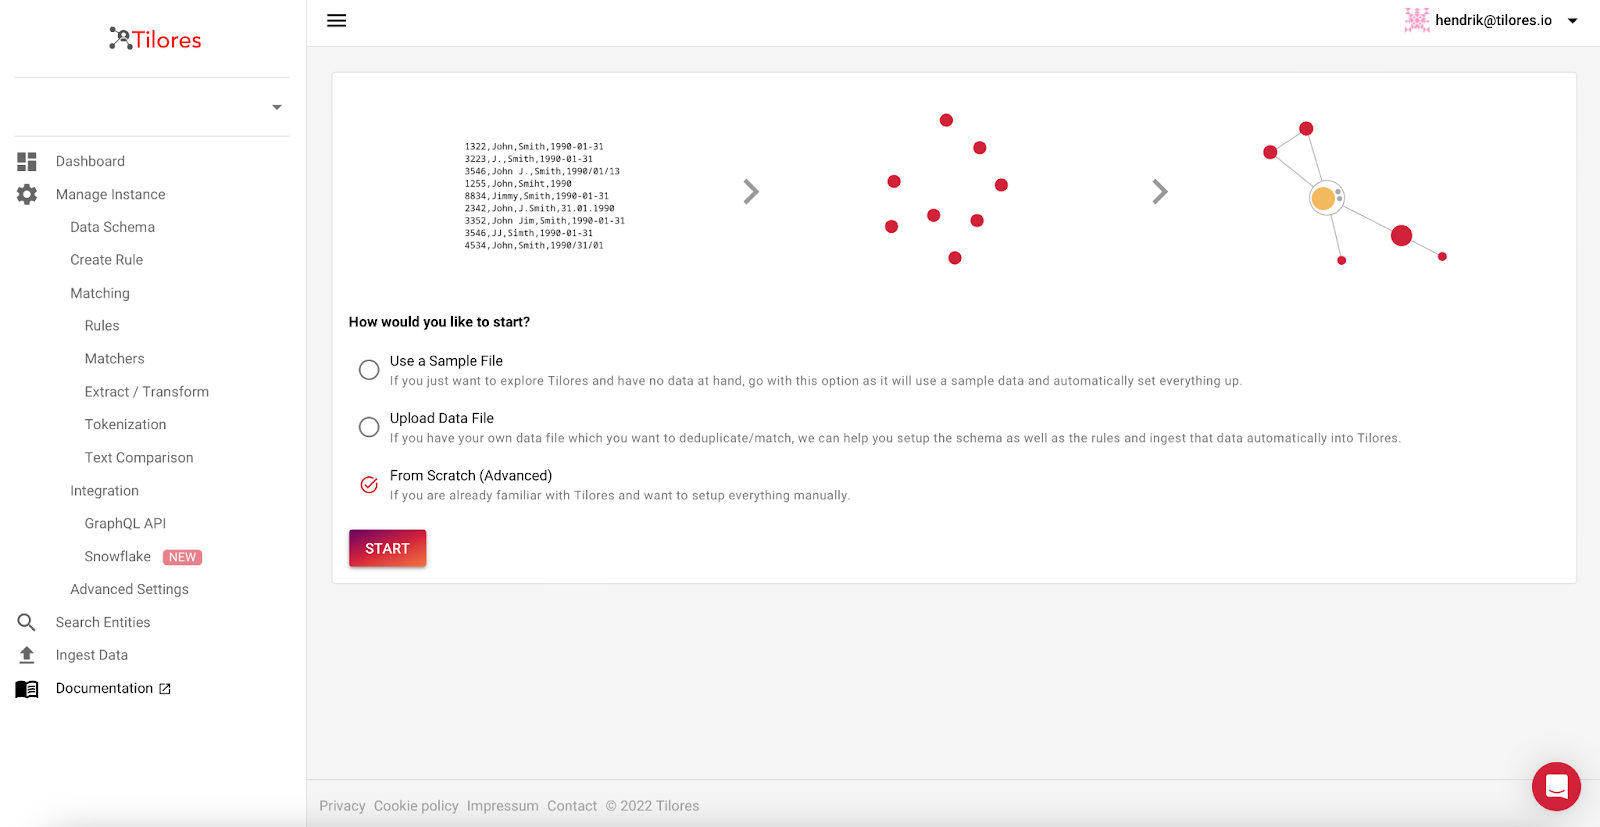
Now we need to sign up for Tilores at https://app.tilores.io. After signing in we setup our first instance from scratch and create the initial schema.
We can simply export some rows from Snowflake as a CSV file.

Upload the csv file to the Data Schema Wizard. Tilores uses the file to create the schema.
The resulting schema will be used for easier rule configuration as well as for any access using the GraphQL API.

Matching Configuration
Next, we're going to configure a simple rule for matching two records on the exact email address.
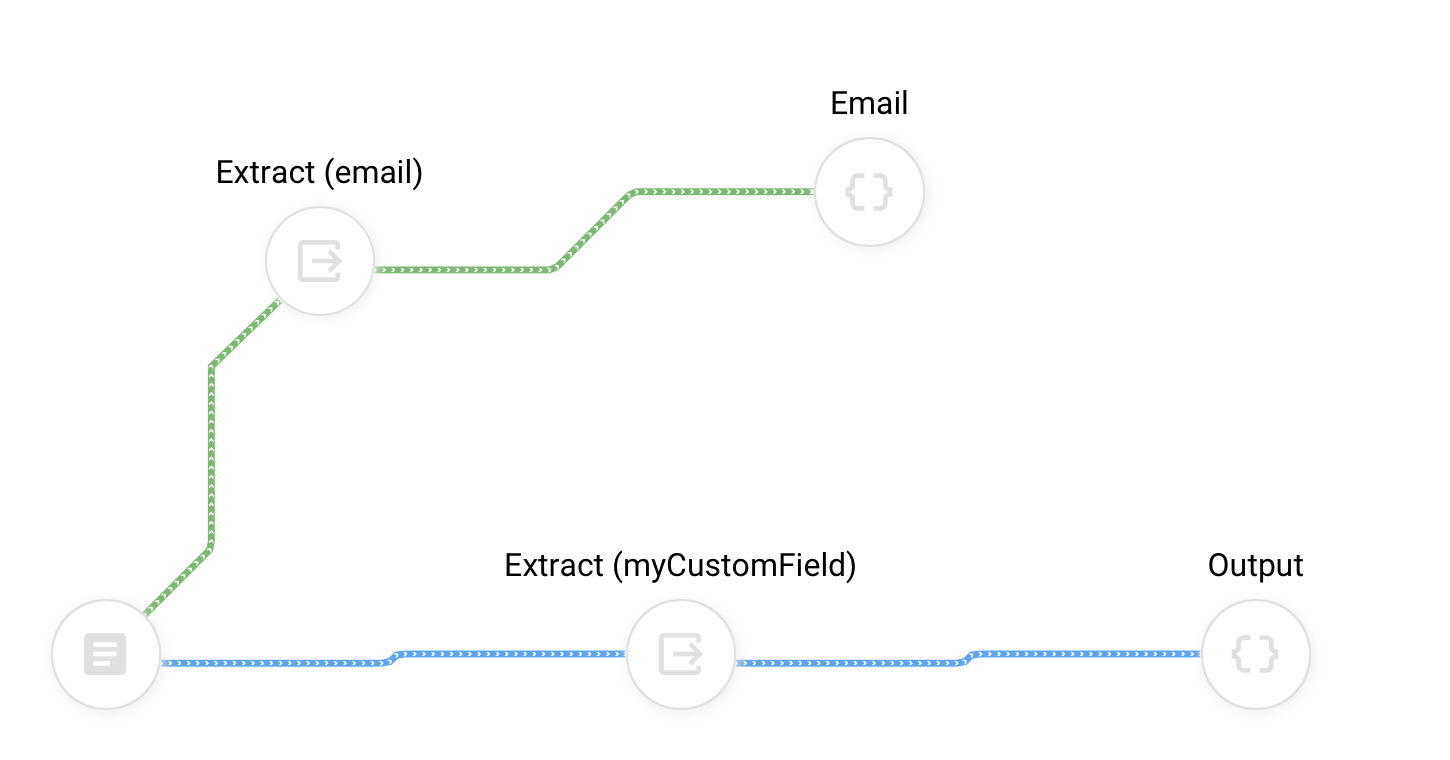
We go to Extract / Transform and drop the Extract node into the workspace and select the email as the path. We connect it with the Source node (from Source node to Extract node).Then we drop the Output node into the workspace, name it Email and connect it to the Extract node.
Now we go to Matchers and create a matcher for the email output that we created before.

We move up the navigation to Rules and create a new rule that should match based on our Email matcher.

To activate the rule we have to add it to the Rule Set Configuration.

You can have as many rules as you like.
If at least one rule matches, then the two records match and are linked with each other.
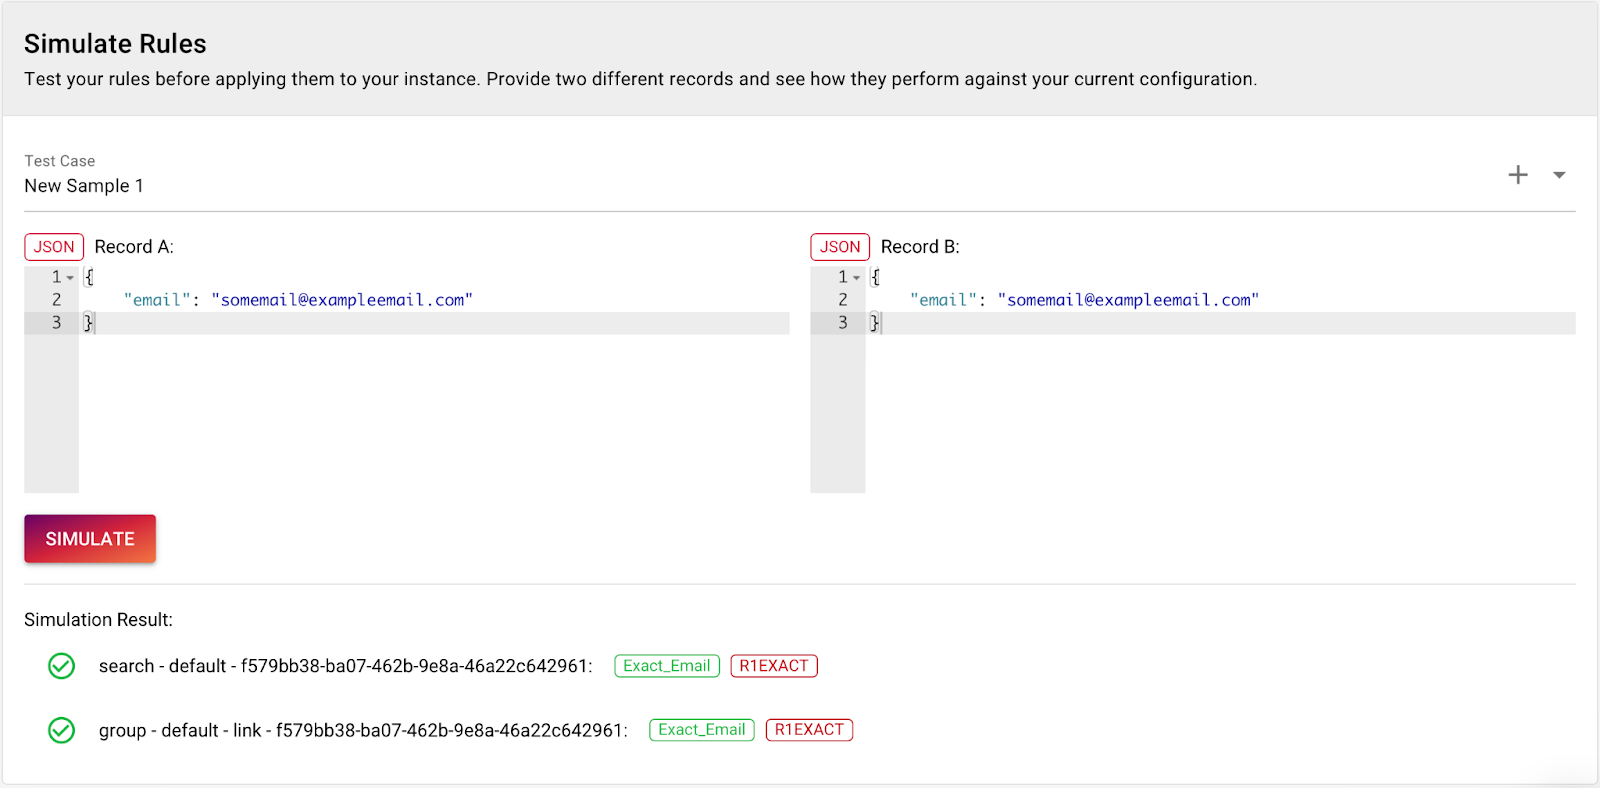
We can test the configuration using the built in rule simulation. We enter two records, one on the left and one on the right and then click simulate. The result will show us which rules matched between both records.
The second rule that we will create matches if the name is similar.
We first join the different name fields into a single value and then use phonetic token equality to compare the values.
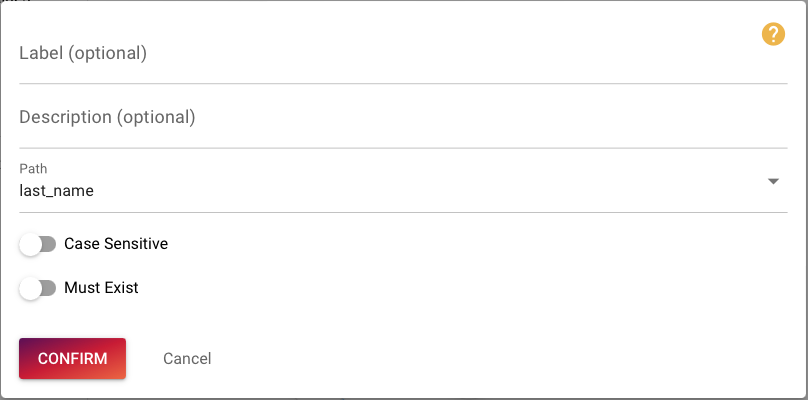
Again go to Extract / Transform, drop the Extract node 3 times for the path name, last_name and first_name. In this example please deactivate Must Exist for all three name nodes as this is not needed here.
Then drop the Join node with the Join Strategy Concatenate Texts and use a space as Separator.

Next connect an Output node to the Join node that you call Name. It should look like this:

Now the matcher and the advanced text matching have to be configured. Go to Tokenization and create a new Word-Based tokenizer.

Then go to Text Comparison and create a new comparer using the Metaphone algorithm.

Now we go to Matchers and create a new matcher that uses the tokenizer and the phonetic similarity matching. Select Advanced Text Matching use the Name as Transformation Output, the Word-Based Tokenization that we created before and the Metaphone comparer. For the Token Strategy select Token Ratio using a Ratio of 0.5.
This configuration will allow us to match similar strings in the name fields.

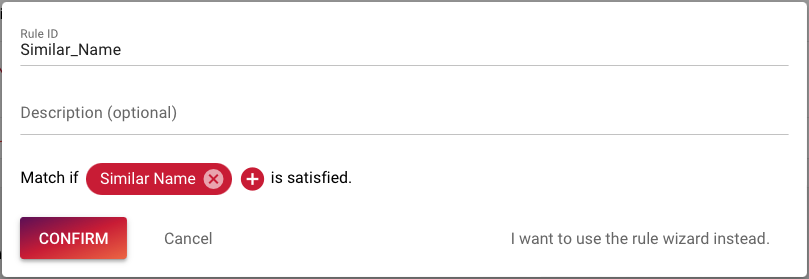
To be able to use this matcher we have to create a new rule that we call Similar_Name. We add the Similar Name matcher by clicking the plus sign and selecting the Similar Name matcher.
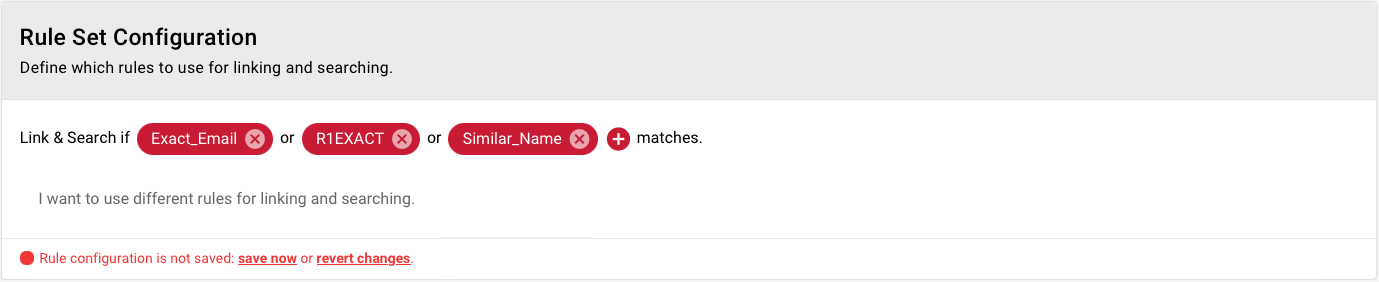
Last the rule has to be added to the Rule Set so that it is used during matching.
To test the configuration we add this JSON into the first box of the Rule Simulator.
and this one into the second box
When you click Simulate you see that the Similar_Name rule matches.

To apply now all the changes we first have to save the configuration and then deploy it to production. Please click save now and then navigate to Advanced Settings. Here click Deploy. This will now create your instance of Tilores that is accessible by Snowflake.
Connecting Snowflake and Tilores
Once the instance is deployed, we can continue to set up the Snowflake integration in Snowflake.
Go to Integration - Snowflake, copy the code from 2. into your Snowflake workspace and execute it there. This will create the API Integration.
The resulting status should be Integration API_INTEGRATION_TILORES successfully created.
Next copy 3. to Snowflake and execute it. This will create the external functions needed to communicate with Tilores. The status should be Function TILORES_MATCH successfully created.
Copy 4. adjust it if needed and execute it in Snowflake. This will create the necessary access. The status should be Statement executed successfully.
Finally copy 5. and execute it in Snowflake. Then copy the API_AWS_IAM_USER_ARN value from Snowflake and paste it into the User ARN field in Tilores. Please do the same for API_AWS_EXTERNAL_ID and then click Update to activate the connection.
This should show this banner:

Now Snowflake and Tilores are connected.
Ingesting data from Snowflake to Tilores
We can now ingest the data from the orders and newsletter subscription tables from Snowflake into Tilores.
Querying Tilores using Snowflake External Functions
Using external functions will provide us with the full Snowflake query capabilities.
We can query the resulting entities for example by using the Tilores entity by record ID function. This will return us an object that contains an entity ID, all records of that entity and the links between those records.

The output can be improved by using Snowflakes lateral join and the flatten table function.

This also allows us to only query the values from the entity that we are interested in. Using Tilores search allows us to query matching entities to any given data.
Intelligently connecting Snowflake data with Tilores' matching capabilities leading to data insights
For example given the wrongly spelled John Smiith we can identify a payment default under the name Robert Smith due to the information available in the newsletter subscription.

We know that those two orders actually belong to the same person.
Conclusion - entity resolution in Snowflake with Tilores
The use cases for conducting entity resolution with Tilores on Snowflake data is not limited to data about people. Any sort of data in Snowflake can be deduplicated and linked using Tilores, such as product data or company data.
Combining Snowflake's strengths in data warehousing with Tilores' realtime entity resolution capabilities leads to
-
clean data
-
unified customer accounts
-
invalueable insights into the data
-
saved costs
-
less fraud
By the unique integration of both systems data analysts can use their usual tools within snowflake to analyse and work with the data.